Observing and Studying Glass under a Microscope
Overview
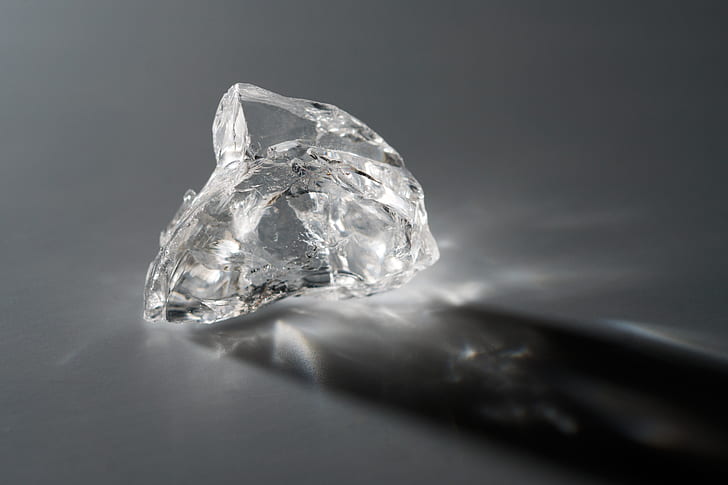
Glass can be described as a non-crystalline, amorphous solid that is usually transparent. Throughout history, glass has had many uses, ranging from decorative purposes to various technological applications.
Due to the many properties of glass, scientists have been able to modify and enhance it through cutting, painting, and polishing, etc making it possible to use glass as lenses, glassware, mirrors, and even optical fibers (through which high-speed data is transmitted). However, there are many more uses of glass in different industries across the world.
Ordinary glass is made using such components as silica, bleaching powder, calcium oxide, and various alkaline metals. However, it's worth noting that there are various types of glass consisting of different components in many quantities. Whereas flint glass (used in electric bulbs and camera lenses) consists of potassium carbonate, Pyrex glass (used for the production of various laboratory equipment) mostly consists of barium silicate and sodium silicate.
Some of the other types of glass include:
- Photochromatic glass
- Lead crystal glass - Made of potassium carbonate, silica, and lead oxide
- Xena glass - Made of zinc and barium borosilicate
- Quartz glass - Made of silica
- Crown glass - Made of potassium oxide, silica, and barium oxide
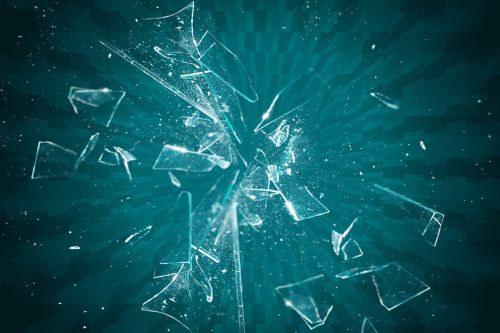
* Glass is also modified in various ways for specific uses. Tempered glass, for instance, is manufactured using sand, lime, and sodium carbonate, and heated in a manner that allows it to break into dices rather than shattering. On the other hand, bulletproof glass consists of ionoplast polymers, ethylene vinyl acetate or polycarbonate.
Brief History of Glass
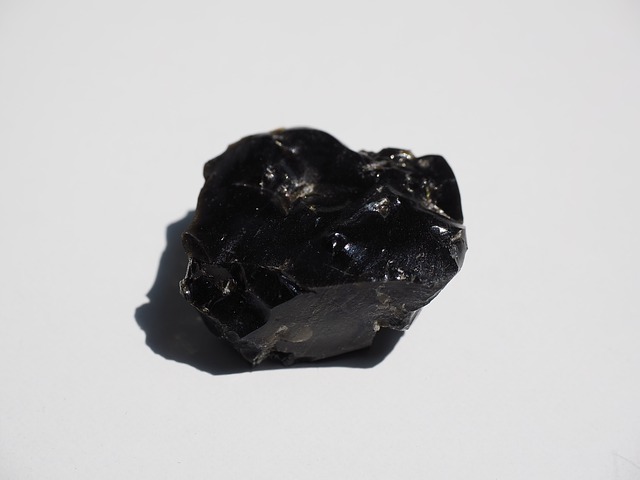
Throughout human history, glass has been used in one form or another. Before learning how to make glass, human used Obsidian, naturally occurring volcanic glass, as knives, jewelry as well as for making arrowheads etc. Over time, however, human beings learned how to make glass using various elements in their surroundings.
According to archaeological evidence, it's generally believed that glass was first made around 3500 BC by Egyptians and people from Eastern Mesapotamia. 2000 years later, these civilizations were able to modify glass for the purposes of making various glass vessels for use. In other parts of the world (outside Eurasia and North Africa), it was not until 1500 AD that people started making glass.
Although evidence suggest that human beings were making glass (man-made glass) as early as 3500 BC, it was not until 500 -700 BC that the industry grew significantly in different parts of the world (Syria, Egypt, east coast of the Mediterranean Sea etc). This resulted in the production of different types of glass products including vessels and various glass equipments.
As the industry continued to flourish, new equipment for manufacturing glass was also invented making the process easier and cheaper. One of the best examples of this is the blowpipe that was invented in the 1st Century by Syrian craftsmen. Over time, new techniques continued to be developed for not only making glass but also for making a variety of products for use (bulbs, bottles, tubes, window class etc).
Investigation of Glass
Analysis or the study of glasses involves the use of various technologies including x-ray technology, optical spectrometer as well as microscopy techniques. Typically, this is done with the intention of studying/investigating the structure and various properties of glass.
These techniques are used in a number of fields for various purposes. In archeology, the investigation of glass through the techniques mentioned above allows researchers to not only learn of the various components used for their manufacture, but also determine where they came from and the time period in which they were made.
Studies, samples from Persia and Mesopotamia have been shown to have consisted of alkali from plant which consisted of more potassium and magnesium oxides. In forensics, on the other hand, such studies/investigation can allow specialists to learn of the origin of glass fragments, their refractive index (using hot stage microscopes) as well as how they may fit to given cases while collectors use these techniques to determine whether given samples are genuine or not.
Glass under a Microscope Experiments
For this experiment, you will observe and study three types of glass under the microscope.
These include:
- Obsidian
- Common glass
Objective
By the end of these experiments, you should be able to:
- Prepare glass samples for microscopy
- Learn how to use a microscope for glass analysis
- Identify the structure/morphology of glass under the microscope
Obsidian
As mentioned, Obsidian is a type of glass/rock formed from volcanic activities.
Typically, it's formed when molten rocks (of volcanic activities) cool rapidly causing the atoms to arrange in a manner that forms a non-crystalline structure. Depending on where it is formed, Obsidian may vary from black or dark brown to brown (e.g. mahogany obsidian) and white spotted (snowflake obsidian) which is black with white spots.
Requirements
- Obsidian simple
- Microscope glass slides
- Microscope coverslips
- Water and a container
- Canada Balsam or Lakeside resin
- Grinding wheel
- Continuous-rim blade
Procedure
The preparation of the rock/glass is aimed at making thin sections that can be viewed under the microscope.
This involves the following steps:
· Hydrate the rock by placing it in water
· Using a continuous-rim blade, carefully cut the stone to get slices of between 0.5 and 1mm in thickness
· Using a grinding wheel, carefully remove any edging material that may have formed during the cutting process
· Using lakeside resin or Canada Balsam, cement the slice of Obsidian onto a clean glass slide
· To reduce the thickness of the glass/stone further, grind it using a rotating metal lap with about 10 micron-sized abrasive - This should reduce the thickness of the sample by half of what it was
· Remove the Obsidian from the slide, turn it over and cement it again onto the slide - so that the surface that was ground first is now cemented to the slide
· Grind the slice again to get a thickness of about 0.08 mm. However, you can continue grinding the slice (carefully) if it is still opaque
· Using Canada Balsam or Lakeside resin, cover the slice using a coverslip so that the sample is sandwiched between the slide and the coverslip
· Mount the slide on the microscope stage for observation
Windscreen and Common Glass
Windscreen and common glass are investigated using various techniques depending on the purpose of analysis. One of these techniques involves the use of a microscope.
Requirements
- Glass sample (common/Ordinary or windscreen glass)
- Stereo microscope
- Pair of tweezers
- Glass slide
Procedure
Using a pair of tweezers, carefully pick a small piece/fragment of the glass and place it on a slide or a piece of paper (you can use a colored piece of paper for this)
* As compared to a stereo microscope, a macroscope provides a larger field of view as well as a long working distance.
* A stereo microscope can also be used. As compared to a macroscope, a stereo microscope provides a true stereo image.
Mounting glass samples on a microscope (Obsidian, windscreen glass, and ordinary/common glass)
* Obsidian is also analyzed using a compound microscope.
Procedure
· By turning the stage adjustment knob, lower the stage in order to mount the slide
· Place the slide on the microscope stage and hold it in place using the stage clips (clips are located on the stage)
· Turn the revolving turret in order to set the lowest power objective in place
· You can carefully lift the stage using the stage adjustment knob to the appropriate position
· Gently turn the course and fine adjustment knobs until the image comes into focus
· You can adjust the amount of light by adjusting the condenser - This will allow you to set the appropriate light intensity in order to get a clear image of the sample
· Again, lower the stage and turn the turret to switch to higher magnification and observe the slide - This will allow you to compare the image under lower and higher magnification
· Lastly, lower the stage to remove the slide
Observation
When viewed under the microscope, Obsidian will appear black with some hydration rims that have been shown to result from glacial abrasion. On the other hand, windscreen and ordinary glass (under ✕6 and ✕ 40) will show clean fracture surfaces.
Depending on the glass, it may also be possible to see a few pits and scratches on the surface of the glass. By using a macroscope (which provides ✕100 and ✕120) magnifications, it is possible to get a larger field of view that will make the scratches and pits more clear.
* Apart from a compound, a stereo microscope, and a macroscope, students can also compare the surfaces of different types of glass using fluorescence and polarized microscopes.
Conclusion
As mentioned, there are several types of glass used for various purposes. Using a compound, stereo, and macroscope, students can investigate and compare the surfaces of the different types of glass (including painted glass) and compare how they appear.
While it might not be possible to observe the components of glass (components that made the glass under investigation) using these types of microscopes, observing the surface can provide such information as scratching thus allowing students to get an idea of where the glass sample has been.
Return to Beginner Microscope Experiments
Return to "What looks Cool under a Microscope?"
Return from Glass under a Microscope to MicroscopeMaster home
References
Bekir Karasu, Oguz Bereket, Ecenur Biryan, and Deniz Sanoğlu. (2017). The Latest Developments in Glass Science and Technology.
Brian Caddy. (2001). Forensic Examination of Glass and Paint Analysis and Interpretation.
David Whitehouse. (2012). Glass: A Short History.
Jay A. Siegel. (2015). Forensic Chemistry: Fundamentals and Applications (Forensic Science in Focus) 1st Edition
Links
https://www.researchgate.net/publication/229563463_Perspectives_on_the_History_of_Glass_Composition
https://ncfs.ucf.edu/research/physical-evidence/glass/
Find out how to advertise on MicroscopeMaster!
