How does a Microtome work?
Function
|
Invented between 1865 and 1966 by Wilhelm His, a Swiss anatomist, a microtome is a mechanical device that is commonly used in microbiology for cutting embedded tissue to produce very thin slices (sections). To study specimens at the microscopic level, the specimen has to be cut in order to produce very thin slices. Depending on the thickness of the section, this either allows light to pass through the specimen (transmitted) or reflected. |
Here, a microtome is particularly useful given that it's possible to produce and reproduce sections of uniform (and desired) thickness for microscopy.
As compared to free-hand sections, sections produced using a microtome are also free of damage as the device is highly accurate and precise. For different types of specimens, there are different types of microtome that can be used.
These include:
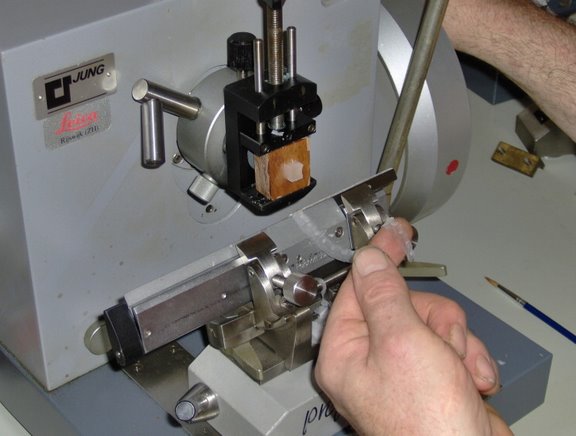
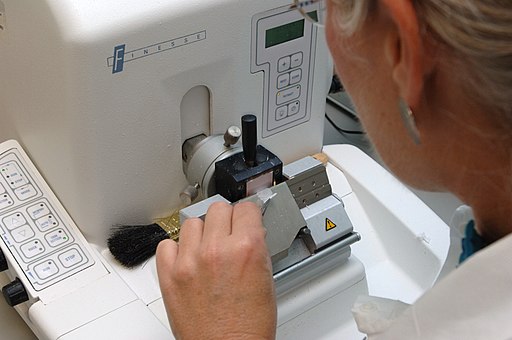
Rotary microtome - This is one of the most common microtomes (it can be electric or manual). It's used in many laboratories to produce sections of between 1 and 35um in thickness
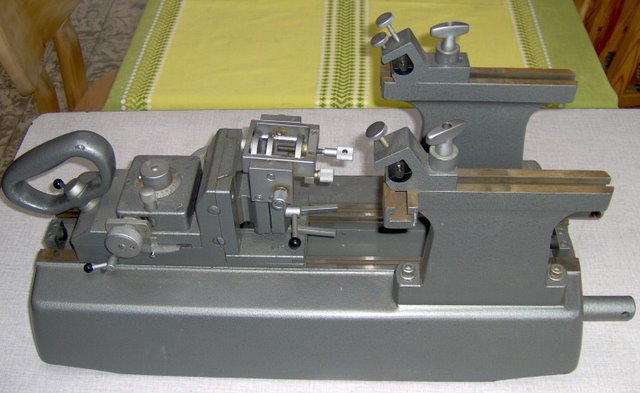
Base sledge microtome (also known as the sliding sledge microtome) - This microtome is particularly useful for cutting hard blocks or larger specimen.
Rocking microtome - This type of microtome is used to cut/section paraffin blocks through the rocking action of the cross-arm
Freezing microtome - As the name suggests, this type of microtome is used to cut/section frozen sections
Some examples of other microtomes include:
- Vibrating microtome
- Ultramicrotome
- Hand microtome
- Saw microtome
- Laser microtome
* While Wilhelm His Sr. is often credited for the invention of the microtome, invention of the device can be traced back to the 1770s.
Application
As mentioned, the main function of a microtome is to cut embedded tissue (in blocks) and produce very thin sections. These can be as small as 1um in thickness. For this reason, they are some of the most important and useful devices in histology and pathology.
Some of the main microtome applications include:
Routine histological technique - In histology, tissues are normally hardened by replacing water with alcohol. Once the tissue is hardened, a microtome is used to cut and produce sections of varying thicknesses.
Here, rotary and sliding microtomes, which are both paraffin microtomes, are commonly used. While they have differences in their working mechanisms, they are both highly precise and produce uniform sections.
Cryosectioning - Cryosectioning is a technique commonly used to produce frozen sections for microscopic analysis. As compared to histology, water-rich tissues are first rapidly frozen in the cryostat before being cut. The microtome is also located within the cryostat.
This technique is particularly useful in cases where the goal is to analyze the tissue within the shortest period of time possible. As compared to some of the other techniques, this technique makes it possible to study cells and other parts of the specimen in their native state (or near their native state).
Botanical microtechnique - Botanical Microtechnique is part of botanical histology used to study plant specimens at the microscopic level. For this reason, a microtone is used to produce sufficiently thin sections to be analyzed under the microscope.
As compared to animal specimens, plant specimens are harder which necessitates the use of diamond knives (microtome knives). These knives are specifically used to cut a range of harder material including bone and plants etc.
While a microtome is used to cut plant specimens, it is worth noting that for the most part, these sections tend to be thicker compared to those of animal specimens. See plant biology.
Electron microscopy - In electron microscopy, very thin sections are required for analysis of the specimen. Commonly known as ultra-thin sections (as thin as 69nm in thickness), these sections are prepared using an ultramicrotome for transmission electron microscopy. Here, diamond microtome knives are normally used.
Tissue Processing
Tissue processing is an important procedure that precedes sectioning. It has been described as the process through which water is removed from the cells/tissue and replaced with a solidifying medium.
Generally, most tissues are very soft which presents a challenge when trying to cut them in order to obtain very thin sections/slices for microscopy.
For this reason, it becomes necessary to try and harden them so that they are easier to cut. To do this, an appropriate solid medium has to be used providing support for the tissue.
The whole process involves several important steps that include:
Fixation - Fixation is not necessarily one of the main steps of tissue processing. Rather, it's a tissue preparation process that serves to preserve the specimen/tissue components to as close to their natural/native state as possible. This is achieved by stopping degenerative processes that would otherwise occur having derived the tissue of blood supply.
* While fixation serves an important role in preventing degenerative processes and thus preserving tissue components in a near-native state, it's worth noting that the process also causes several composition changes to the components given that it involves replacing water with a fixative.
For instance, by removing water and replacing it with a fixative, the parts of the tissue are likely to swell and become hardened which is different from how they were initially.
Given that there are several types of fixation methods, changes to the tissue component will depend on the method used.
Some of the methods used for tissue fixation include:
Physical methods - Physical methods include heating (commonly used to fix microorganisms) and quick freezing (used to preserve molecule features of the sample).
Chemical methods - Chemical methods include immersion. These are methods where thin samples (less than 0.5 cm in thickness) are immersed in the fixative solution, and perfusion, where the fixative solution is introduced to specific tissues or the entire organism through the vascular system.
Depending on the tissue sample and needs of the technician, some of the most commonly used fixative solutions include:
- Phosphate buffered formalin
- Bouin's solution
- Alcoholic formalin
- Paraformaldehyde
Dehydration
Dehydration is the first proper step of tissue processing and involves removing the fixative and water from the tissue and tissue components. These components are then replaced with the dehydrating fluid.
Essentially, the primary goal of tissue processing is to infiltrate the tissue with paraffin and thus harden it for sectioning. However, given that paraffin cannot mix with water (hydrophobic), it becomes necessary to remove the water as well as the aqueous fixatives used during fixation.
One of the most commonly used dehydrating agents is alcohol. However, in order to avoid causing damage to the tissue components, a series of increasing alcohol concentration is used to dehydrate the tissue.
For instance, this may involve starting with 70 percent alcohol, and increasing to 90 and ultimately 100 percent alcohol. In some cases, technicians start by mixing alcohol with formalin before increasing the concentration of alcohol to dehydrate the sample.
The protocol recommended for dehydration using Isopropyl alcohol (IPA) is as follows:
- Incubate in 70 percent of the alcohol for 1 hour
- Incubate in another jar of 70 percent alcohol for 1 hour
- Incubate in 85 percent of the alcohol for an hour
- Incubate in 95 percent of the alcohol for an hour
- Incubate in 100 percent of the alcohol for an hour
- Incubate in another jar of 100 percent for an hour
* For dehydration purposes, alcohol is often preferred because it causes little distortion to the tissue components. Other dehydrants like acetone and dioxane have a number of disadvantages and are therefore not commonly used.
Clearing
Clearing is the second step of tissue processing and involves removing the dehydrant and replacing it with a solvent that is miscible with both the alcohol (dehydrant) and paraffin. Here, it's again worth noting that paraffin is not miscible with alcohol. For this reason, tissue containing alcohol cannot be properly infiltrated with paraffin.
As a result, it becomes necessary to use a solvent that will effectively replace the alcohol and allow for the infiltration process. In addition to removing the alcohol, the clearing agent also serves to make the tissue more transparent (increasing optical clarity) by increasing the refractive index. Here, a number of clearing agents can be used.
These include:
· Xylene - Xylene is a colorless liquid with an aromatic odor. Although it does not mix with water, it's soluble in various organic solvents making it one of the most commonly used clearing agents.
· Benzene - Like xylene, benzene is a colorless liquid with a sweet smell. It's highly soluble in a range of organic solvents and only slightly soluble in water. As such, it can also be used as a clearing agent. However, it has been shown to be carcinogenic and flammable and therefore not commonly used.
· Cedarwood oil - Cedarwood oil may range from light yellow to pale brown in color. It's characterized by a woody odor and like the other agents, is soluble in organic solvents like ethanol. Although it's a good clearing agent, cedarwood oil penetrates very slowly. For this reason, it's not often used as a clearing agent.
· Toluene - Toluene is also another colorless liquid that is characterized by an aromatic odor. Like benzene, this agent is also flammable and soluble in such organic solvents like acetone and ethanol among others.
* For the most part, clearing agents used for the clearing step have the same refractive index as proteins. Therefore, as a result of the clearing process, the tissue becomes more translucent. This is an important characteristic during clearing as it highlights how effective the process was.
* Clearing also helps in removing excess fat and thus contributes to effective infiltration.
Infiltration
This is the last step of tissue processing and involves infiltrating the tissue with paraffin. Here, the paraffin penetrates the tissue and gradually infiltrates the spaces that were occupied by the clearing agent.
The following steps can be used for this part of tissue processing:
· Fill the container/vial with about three-quarters of melted paraffin
· Incubate at 58-60 degrees C for about an hour
· Carefully discard the paraffin and then repeat this procedure with fresh paraffin
* On the other hand, infiltration/impregnation may be carried out by incubating the tissue in paraffin wax for 15 minutes. This is then repeated using fresh paraffin wax three more times. This ensures that the clearing agent is completely removed while the paraffin occupies the empty spaces.
* The typical paraffin wax is liquid at temperatures of about 60 degrees C. This temperature allows liquid wax to be impregnated into the tissue. Following the series of infiltration, the tissue is allowed to cool at 20 degrees C so that it can solidify.
Embedding - This is the last part of tissue processing and is included as part of infiltration in some books. Also known as blocking out, embedding involves blocking (forming a block) the infiltrated specimen so that it can then be clamped for sectioning. During blocking, a mold is first filled with wax (molten wax) and the specimen/tissue placed into the mold. The medium is then allowed to solidify.
This process involves placing the tissues at the bottom of the mold and immersing them in melted paraffin at temperatures above the melting point of the paraffin. The paraffin is then rapidly cooled so that it can solidify. This may involve placing the mold in a refrigerator (at -5 degrees C) or quickly immersing it in cold water. At this point, the tissue is hardened as ready for sectioning.
* During embedding, the specimen has to be carefully oriented to determine the sectioning plane. Generally, it's recommended that the surface of the section (the surface to be cut) be placed parallel to the bottom of the mold during embedding
Some of the molds used for embedding include:
- Compound embedding unit
- Leuckhart's embedding mold
- Plastic ice trays
- Mold base
- Plastic tissue embedding ring
Sectioning
Following tissue processing, a microtome is eventually used to cut thin sections of the tissue. This is known as sectioning.
The following materials are required for this process:
- water bath
- ice container
- microtome
- microscope glass slides
Procedure
· As already mentioned during tissue processing, tissue orientation is important as it exposes the surface to be cut. However, in the event that the tissue was not properly oriented, then a microtome is used to trim the paraffin blocks in order to expose the surface. To expose the face (surface), one can perform coarse facing on the device at about 30 microns each time until the surface is exposed
· Once the face/surface is exposed, the tissue blocks are chilled in ice - Chilling has been shown to make the cutting process easier. In addition, soaking the surface with a little ice water is also recommended particularly for tissues that have been overly dehydrated.
· At this point, the water bath (containing ultrapure water) should be ready (temperatures of between 40 and 45 degrees C)
· To start cutting, the blade is carefully placed in the holder and secured at the appropriate angle - Depending on the microtone, this may range from 1 to 5 degrees
· The paraffin (which contains the specimen/tissue) is then inserted into the tissue holder and appropriately oriented to ensure that the blade cuts straight across the exposed surface
· While approaching the block with the blade to cut the first thin section, checking to ensure that the block is well positioned is always recommended - This allows for adjustments to be made when need be
· Cut thin sections and use a pair of tweezers to pick the ribbons and float them on the surface of the warm water - This allows them to flatten on the surface of the water
· Adhesive can then be applied on a microscope glass slide so that the thin sections stick to the slide when the slide is used to pick the sections
· The slide can then be placed upright on a rack before being placed in an oven overnight to dry - Placing the slide in the oven also allows the paraffin to melt off the slide
See more on lab accessories: Laboratory Centrifuge
Return from How does a Microtome work? To MicroscopeMaster home
References
Andrew Lisowski. (2019). Science of Tissue Processing.
Geoffrey Rolls. An Introduction to Specimen Processing.
F. Mohammed, T.F. Arishiya and S. Mohamed. (2012). Microtomes and Microtome Knives – A Review and Proposed Classification.
Mahtab Uddin Ahmed. (2016). Steps of tissue processing in histopathology laboratory,Review Report.
Links
https://www.abcam.com/protocols/sectioning-of-paraffin-embedded-tissue-video-protocol
https://mmegias.webs.uvigo.es/02-english/6-tecnicas/2-metodos-fijacion.php
Find out how to advertise on MicroscopeMaster!
